Inventory
This section explains how you can upgrade the device OS using ONES.
You can onboard all the devices on the application and can get a complete view of all the populated tables
Agent-Based devices will automatically added using the auto discovery feature
Agent-Less devices needs to be added using this inventory page
The Inventory tab has the below mentioned features:
Custom OS upgrade: Upgrade the device OS with any customised image. You need to provide the correct path to ensure the OS is updated successfully
OS upgrade via ZTP: Upgrade the device OS via Zero touch provisioning
Reboot devices: Reboot the device from a single click in the UI
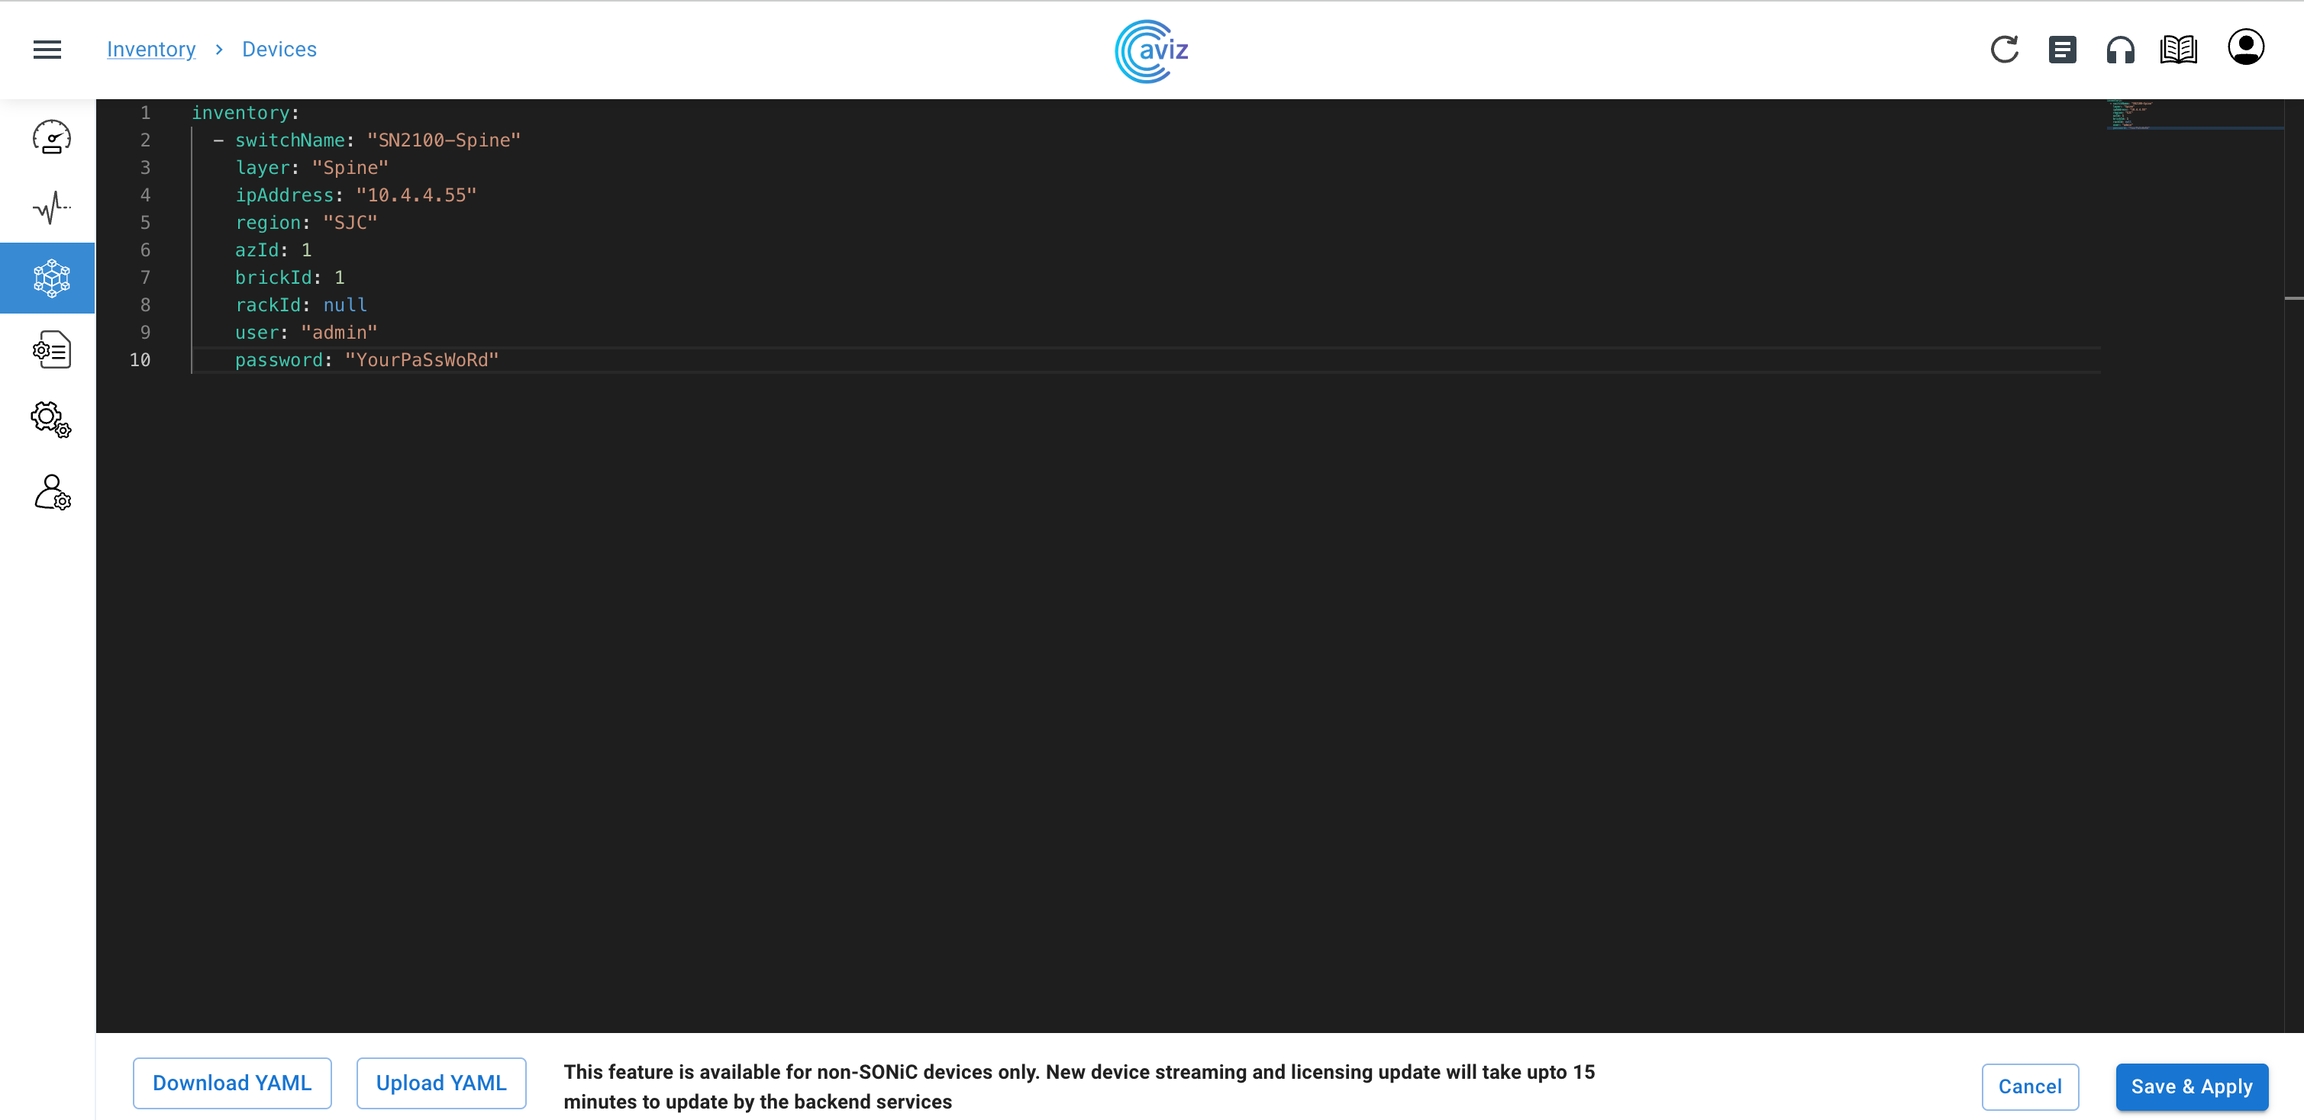
Add devices from the dashboard: The User can onboard the non-sonic devices using the YAML file upload or via the in-built editor in the UI
Remove devices from the dashboard: The user can remove the auto-discovered(Agent based) and non-sonic devices
Devices
Navigate to Inventory >> Devices

Using this tab, user can:
Onboard the non-sonic(Agent-Less) device to the application using Add devices
Upgrade the device using Custom Upgrade
Upgrade the device using ZTP (Zero Touch Provisioning)
Reboot individual devices or multiple devices by selecting them in one click
Remove the devices
Add Non-Sonic Devices
Upload Device Inventory using YAML editor
Navigate to Inventory >> Devices >> Add Devices

Use the below sample format to add devices to the application
Make sure to use the correct indentation for the YAML files
Make sure the Switch Name matches to Hostname of the device
Click Save & Apply
ONES Application is now ready to manage the added devices


Feature Set
Role / Region: Shows the device roles and regions
SKU / ASIC: Shows the device hardware SKU and ASIC vendor
Port / Max Speed
Shows the number of ports per device and max ports speed on the device
Click on the number of ports to get a detailed view of all the ports on a particular device

PSUs / Fans: Shows the total number of Power supplies and Fans present on a particular device
NOS Image: Shows the details of the network operating system running on the device and when it was last updated
ONIE Version: Shows which ONIE version is running on the device and when the last reboot time of the device
Agent Version / Network OS: Shows the agent version running on the device and the current active OS version on the device
Agent status / Last contact: Latest status of the Agent and when it was last communicated with that Agent.
Connect: Using this feature we directly get the CLI access of the device, so we can use this if we need some tuning or need to push some extra config
Details: This last option we can again use to get the details of the device

Remove Devices from the Application
Navigate to Inventory >> Devices >> Remove Devices

Choose the devices to be removed & confirm

once the user clicks on confirm, the Inventory page will remove the device
If the devices are agent-based they will get added again after some time, if the user wants to remove the agent-based devices, then the user need to uninstall the agent from the device
Now the selected devices have been removed from the ONES application

Custom Upgrade
This feature gives the control to upgrade the device to the new version
An HTTP image link is required to use the custom upgrade
Select any of the devices to upgrade to the new version

Click on
Custom Upgrade

put the new Image URL and then
Submit
HTTP image URL should be accessible
This image will be downloaded to the device and configured as the next boot image and devices will be reloaded
Once the device comes up with the new image, the ONES application will install Telemetry and Fabric manager agent
when we upgrade any device that will be locked to do any further changes after a successful upgrade user can again use the same device for another task
Once the image is loaded, the ONES application will show the last image details and time stamp
Upgrade via ZTP
Using this page a user can directly upgrade the box
Select any of the devices to upgrade via ZTP

Click on
Upgrade via ZTP

Click on
Yes
when we upgrade any device that will be locked to do any further changes, after a successful upgrade user can again use the same device for another task
Reboot Device
Here we will see how we can reboot a device using
We have the option to choose one or multiple devices at a time to reboot
Choose one of the devices that we want to reboot

Click on RebootClick on Yes
While rebooting the device, the device will be locked to do any other task, once the reboot is successful, the lock will be removed and the user can take any new action