
User Management
Overview
Use this feature to
Create new users and roles
Remove and suspend existing user one by one
Remove and suspend multiple users at the same time
Password reset of existing users
Only super admin or Enterprise admin can perform these actions
Users
Navigate to User Management >> Accounts >> Users

Initially, we get one default Admin User Credential
In this view, we get the User status and Role given to it and the Last login time by the user.
On this User tab, we can Add new users and can remove or suspend any existing users
Users - Add New
Navigate to Accounts >> Users >> Add
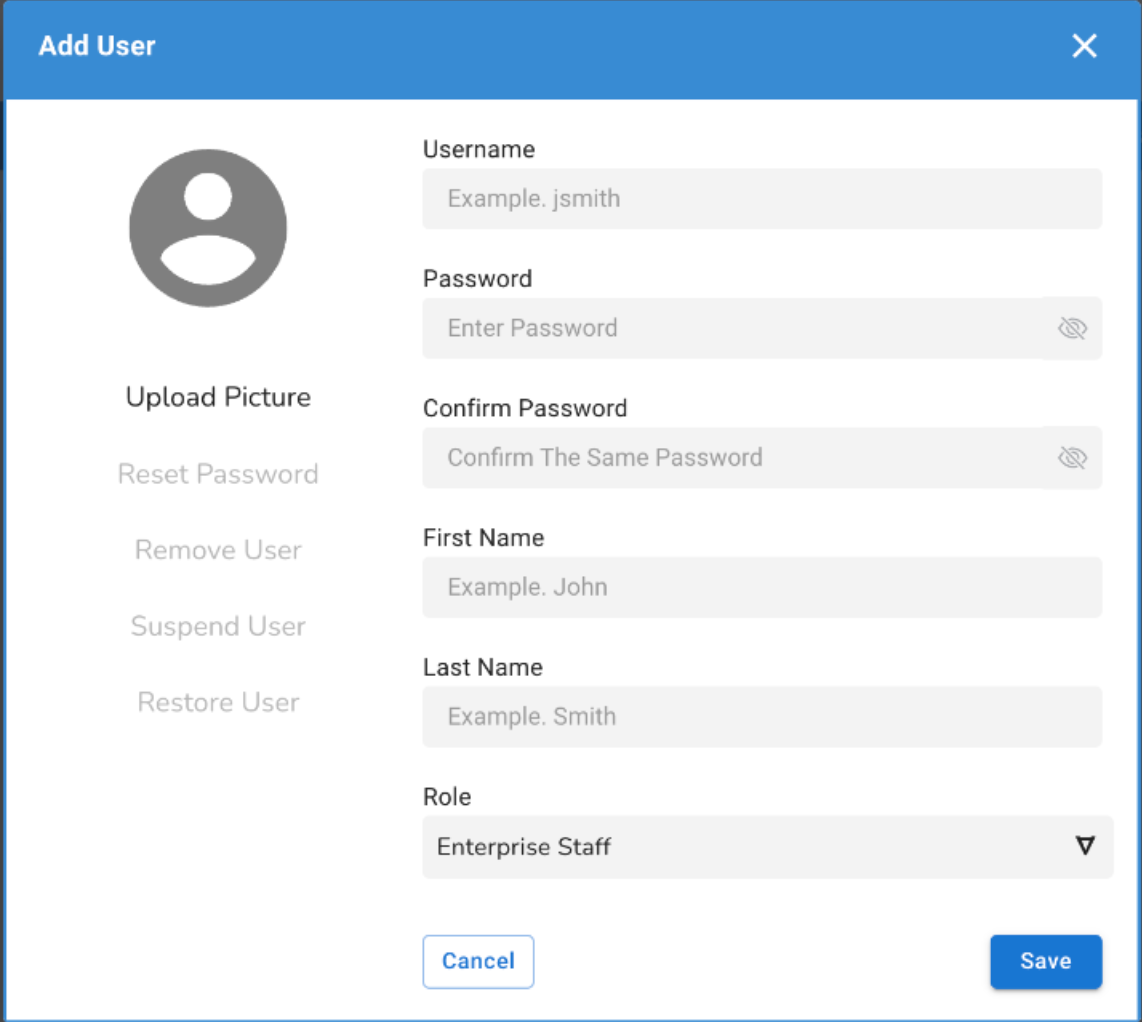
Admin can add
Profile picture
Username
Password
Password should contain:-Minimum Password Length - 8 charactersMaximum Password Length - 24 charactersCharacter Support - Alpha NumericSpecial Characters - (# @ $ ! & % only)Character Rule - At least one Upper Case and one special character
First and Last Name
Role
Enter all the required details
Click
Save


"on the first login by the user with given details, ONES application prompt with a screen to rest the password

Now User is ready to login with valid credentials
Users - Reset Password
Navigate to Accounts >> Users >> Edit User >> Reset Password >> Yes
Using Admin credentials you can reset the user password

Click on Reset Password

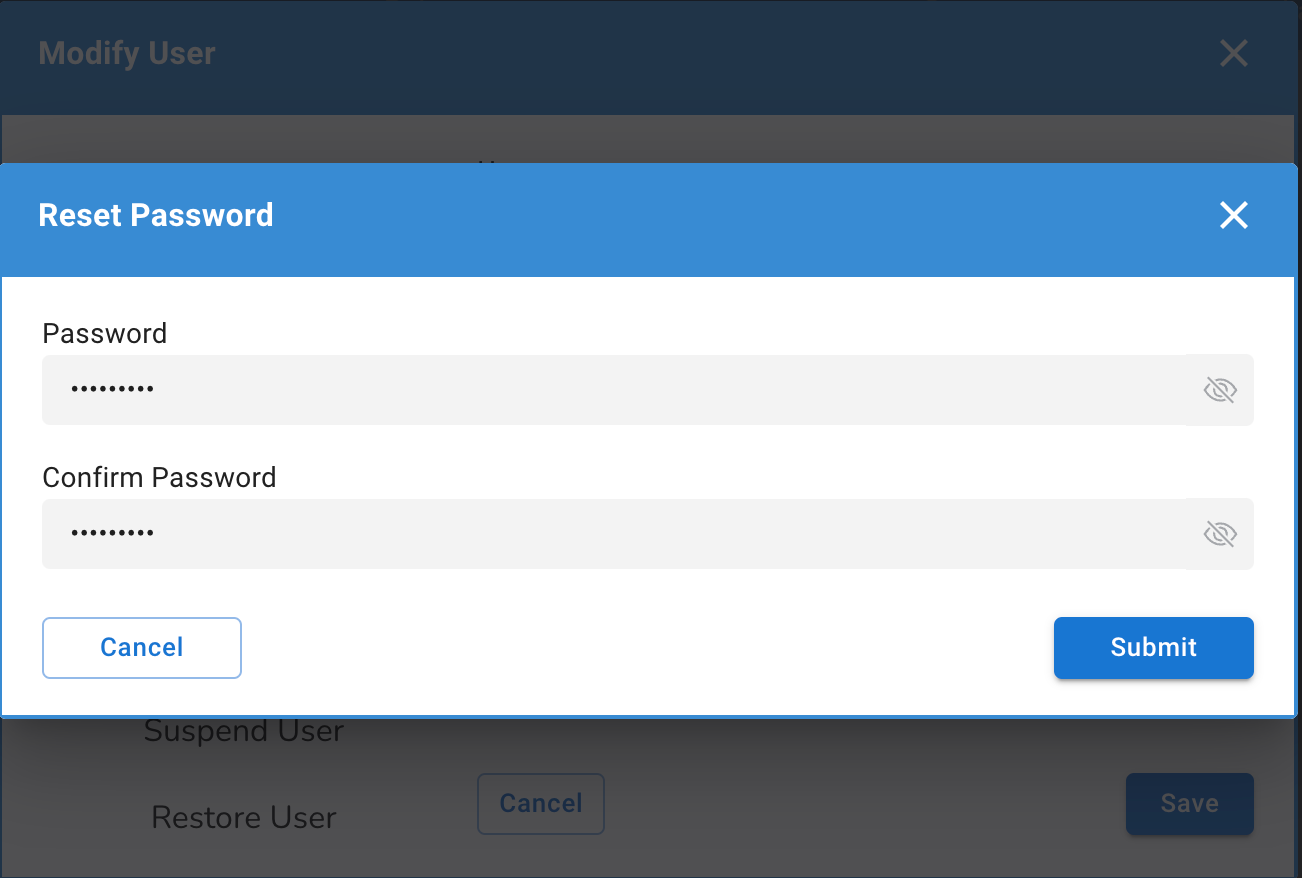
Submit&SaveAfter this user can try login with the temporary password, on the first login, ONES application actively asks to change the password

Users - Remove User
Navigate to Accounts >> Users >> ((Select Users you want to remove)) >> remove >> Yes
We can remove multiple users at a time


After this, the user will be removed from the database and cannot use credentials to login again
Users - Suspend User
Instead of removing any user, we can also suspend the user
Once we suspend a user it will not be removed from the database but it will be in an Inactive state in the database
Later if we need we can restore the user to its active state
Navigate to Accounts >> Users >> ((Select Users you want to suspend)) >> Suspend >> Yes

Choose users & click on
Suspend


Users - Restore User
Navigate to Accounts >> Users >> ((Select Users you want to restore)) >> Restore >> Yes


Roles
Navigate to Account >> Roles

By default, the device comes with these 4 Roles
Super Admin
Enterprise Admin
Enterprise Staff
Vendor Staff
As per the new user access requirement, we can assign limited access to user roles
Roles - Add User Roles
Navigate to Accounts >> Roles
Now let's add few extra permissions
Add/Remove Devices
Configure Device
Run ZTP

After giving permissions, the user can be added to this role in the user section.