ONES Orchestration

This section explains how large data centers can be designed seamlessly using ONES.
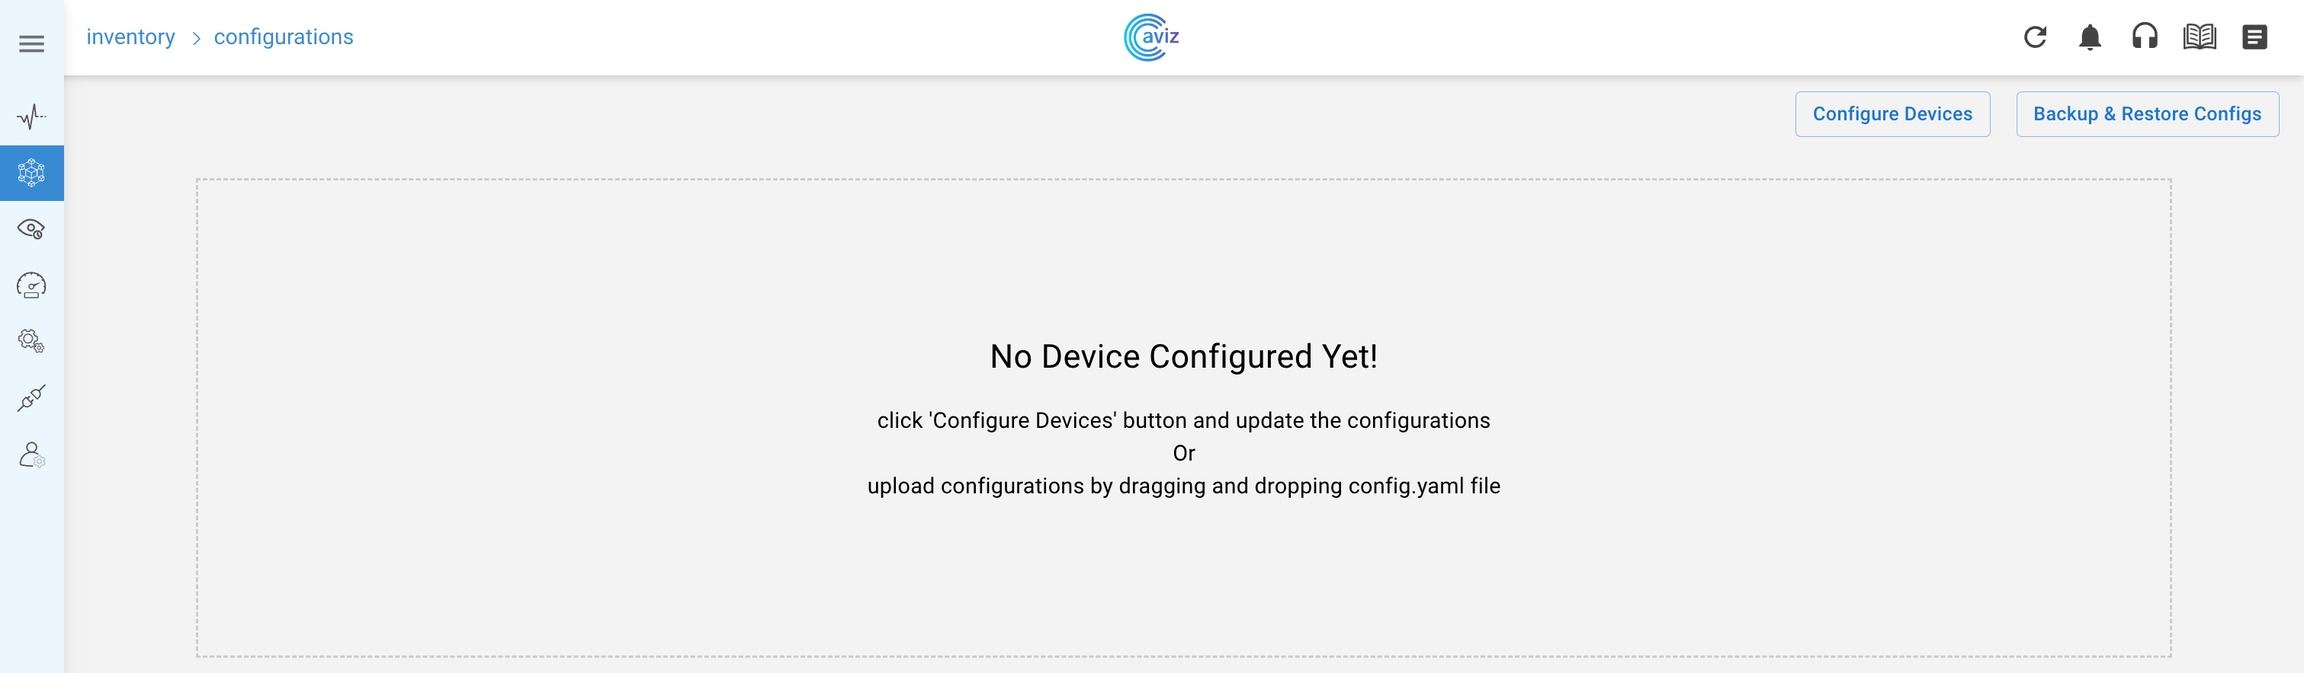
Configuring Devices

Most fabric orchestration solutions available today are complex and often difficult to understand. ONES provides simple and effective tools, such as predefined templates (YAML file), to configure data centers at scale. ONES allows a customized way of configuring devices that includes enhancements to the standard configuration.

Configuration Commands:

  • Save Config:

    sudo config save -y
  • Copy to File:

    sudo cp /etc/sonic/config_db.json /host/backup_config_db.json
  • Restore Config: //If needed only

    sudo config reload /host/backup_config_db_json -y

You need to provide the following inputs to configure the devices:

Device Details

Username - Device User-Name

Management IP - Device IP for management

Device Credentials - Login admin user-name & password with write permission

BGP ASN (Autonomous System Number)

Local AS number - Local BGP AS number a user wants to use

Subnet Details

IPv4 Subnet - IPv4 address range a user wants to use in the domain

IPv4 Loopback - IPv4 address range to use on the devices only for the loopback address

IPv6 Subnet - IPv6 address range a user wants to use in the domain

Connectivity

Link connectivity between (SuperSpine, Spine, Leaf & TOR)

Link Type (Access Trunk)

Layer-2 / Layer3 - interface type

MCLAG Details

VLAN - VLAN to b used for interfaces

PO Group - PortChannel number to be used to bundle the interface

Keepalive VLAN - VLAN a user wants to use to send keepalive messages

VRF number - VRF number to be used for MC-LAG

Host Interface

L2 Access & VLAN - Host facing interface with Access port & VLAN allocation

L2 Trunk & VLAN - Host facing interface with trunk port & VLAN allocation

L3 - Host facing interface with Layer 3 properties

Network Service Address

NTP server - NTP server a user wants to add

Syslog - Syslog server IP address

SNMP - SNMP Server address a user wants to add

VXLAN

VLAN Range - VLAN range a user wants to use for VXLAN Ex. 200-205

VNI Range - VNI range a user wants to use for VXLAN Ex.20000-20005

Any-Cast Gateway - Any-cast Gateway Subnet

Host Per Vlan - Allocation of Host per VLAN

IRB VLAN Range - IRB VLAN is a separate input and should not overlap with VXLAN VNI

IRB VNI Range - IRB VNI is separate input and should not overlap with VXLAN VNI

QoS

dscp_to_tc_map - DSCP to TC mapping a user wants to use Ex. "26:3 | 48:7"

dot1p_to_tc_map - dot1p to TC mapping inputs

tc_to_queue_map - TC to queue mapping inputs Ex. "3:3 | 7:7"

tc_to_pg_map - TC to PG mapping inputs Ex. "3:3 | 7:7"

pfc_enable - PFC value to be enable Ex. "3"

pfcwd - user can choose this feature to be enable disable with below inputs

enable: false

big_red_switch: false

action: "alert"

restoration_time: 400

detection_time: 400

ecn - user can use Explicit congention notification inputs can be added as per infra, below are the inputs can be used

mode: "ecn"

cnp_queue: 7

ecn_gmin: 500000

ecn_gmax: 1500000

ecn_gmark: 10

ecn_rmin: null

ecn_rmax: null

ecn_rmark: null

ecn_ymin: null

ecn_ymax: null

ecn_ymark: null

scheduler:

type: "DWRR"

weight: "0:0 | 1:0 | 2:0 | 3:90 | 4:0 | 5:0 | 6:0"

ONES requires a minimal set of information from the users to configure the devices. The tool is simple to use and allows to configure a large number of devices simultaneously.

Configuration Overview

This section explains the device configuration procedures, that gets applied seamlessly across the entire fabric

  • Navigate to Configurations >> Devices

  • Click on the Configure Devices button in the top right corner. This opens a new screen with a sample device configuration. You can edit the configurations directly in the UI to make the desired changes. You can also download the sample YAML file by clicking on Download YAML button, provided at the bottom of the above screen, make new changes and upload the YAML file using Upload YAML button.

Configure Devices

Allows to make the config changes directly in the in-built UI editor

Download YAML

Download the sample YAML file and make the required changes

Upload YAML

Upload the modified YAML file

A detailed explanation of all the intend fields

Inventory: Specify how many devices you want to add in any particular role - Super Spine, Spine, Leaf, and ToR.

  • Inventory:
      SSpines: 2      #Define the count of devices in the SuperSpine role
      Spines: 2       #Define the count of devices in the Spine role
      Leafs: 2        #Define the count of devices in the Leaf role
      Tors: 1         #Define the count of devices in the Tor role

Connectivity: Specify the parameters required to establish link connectivity such as:

  1. Device switch ID: unique ID for every device, required to correctly render the topology

  2. Switch name: hostname of the device

  3. IP address: management address of the device

  4. Autonomous System Number (ASN): BGP AS number to use

  5. Device Credentials: Username & Password.

  6. MCLAG: Multichassis Link Aggregation

  7. Links: links connected with another device

  • Connectivity:
      SSpine: []      #A role that does not have any device, presented as []
      Spine:          #Delcare all details, the device needs to update.
        - switchId: 1              #Every device we define for a given Role should have an ID that is unique to that Role.
          switchName: EC01         #Use the hostname of the switch
          ipAddress: 10.4.4.61     #Management IP address of the device to connect
          ASN: 1001                #BGP Local AS number
          Credentials:             #User needs to enter device credentials
            user: admin
            password: YourPaSsWoRd
          mclag:                    #used to create multichassis link aggregation
            enabled: True            #used to activate mclag property
            peer: L2                 #Neighbor Device ID (Leaf Switch 2), Peer can be Spine or Leaf device
            keepalive_vlan: 10       #Vlan to use for Keepalive messages
            isoverl3: true           #for L2 MCLAG use false, For L3 MCLAG use true
            
          Links:      #The links between all the devices we manage
                      #SS indicates SuperSpine Role
                      #S indicates Spine Role
                      #L indicates Leaf Role
                      #T indicates Tor Role
                      #H indicates Host port
                      #The next number is device's unique ID from the same respective Role
                      #Then interface name and number
            - link: S1_Ethernet96 | L1_Ethernet96  
                      #S1_Ethernet96 : Spine Role, Switch ID 1 with Interface Ethernet 96
                                                  is connected to
                      #L1_Ethernet96 : Leaf Role, Switch ID 1 with Interface Ethernet 96
              staticLink: True  #True indicates the status is up
              properties:       #This indicates the use of link properties
                mode: 
                    #L2-Trunk  #Used as Layer-2 Trunk
                      #vlan: 200       #Vlan used for mclag 
                      #mc_po_group: 200  #Po number for mclag
                      #vrf: 1          #VRF to be used for mclag, vrf is mendate in symmetric IRB
                    #L2-Access  #Used as Layer-2 Access
                      #vlan: 200       #Vlan used for mclag 
                    #L3-V4            #Only with Host peer
                      #mc_po_group: 201 #Po number to be used
                    #L3-V6            #Only with Host peer
                      #mc_po_group: 201 #Po number to be used
                    #MC-LAG           #Only when we need MC-LAG between links
                    #MC-LAG-BGP       #BGP Neighbourship between MC-Lag Peers using Peer Link

BGP: Specify if you want to enable regular BGP peering or BGP unnumbered peering.

  • BGP:  
        #BGP_U If set to False, this configures regular BGP peering.
        #BGP_U If set to True, this configures BGP unnumbered peering
        #ND_RA is reserved for future development
      BGP_U: False
      ND_RA: 30    

PhysicalIfCfg: Enable or disable FEC and change the MTU settings on all the links being configured.

  • PhysicalIfCfg:
      FEC: On    #Possible values are On or Off
      MTU: 8000  #MTU value a user wants to change
      AdminStatus: Up #Set the status UP 

ASN: Assign a BGP ASN (Autonomous System Number) from the specified pool. Dynamic assigning ASN will be implemented in ONES release 2.0. For release 1.0, you need to specify the ASN under the device configuration, as shown in the sample YAML file.

  • ASN:
      SSpine: 10000-20000
      Spine: 21000-50000
      Leaf: 51000-60000
      Tor: 61000-70000

IPv4Pool: Assign IP pools to different subnets. ONES automatically divides the subnets according to the number of available links.

ONES application uses IPv4 subnets for:

  • Interfaces

  • Loopbacks

  • Host interfaces

  • To configure BGP neighborship

  • ONES automatically advertises these subnets in BGP

    • IPv4Pool:
        Loopback: 19.168.10.0/24
        LeafSpine: 20.168.10.0/24
        LeafTor: 30.168.10.0/24
        Host: 49.0.0.0/24

IPv6Pool: Assign IPv6 subnet.

ONES application uses:

  • IPv6 subnet for interfaces

  • Subnets to configure BGP neighborship

  • Automatically advertise these subnets in BGP

    • IPv6Pool:
        LeafSpine:   #Define IPv6 Pool 
        LeafTor:     #Define IPv6 Pool
        Host:        #Define IPv6 Pool

Note* IPv6 loopback is not supported

NTP: Provide the NTP server address, to enable NTP. You can choose your desired timezone.

  • NTP:
      server: 128.138.141.172
      timezone: Asia/Kolkata
Supported Time Zone

Only SONiC supported time zone

SYSLOG: Provide the SYSLOG server address, to enable SYSLOG.

  • SYSLOG:
      server: 10.1.1.11
    

SNMP: Provide the SNMP server address, to enable SNMP.

  • SNMP:
      trapserver: 10.1.1.11

Parameters: Provide user the ability to enable VXLAN and related Parameters.

  • Parameters:
      vlan: 200-205
      vni: 20000-20005
      anycast_gateway: 100.10.0.0/23
      anycast_mac: 00:11:22:33:44:55
      hosts_per_vlan: 10
      routing_symmetric: True # True / False to indicate its symmetric routing or asymmetric routing
      irb_vlan: 300-305 # irb vlan is separate input and should not overlap with vxlan vni
      irb_vni: 30000-30005 # irb vni is separate input and should not overlap with vxlan vni  
      sag: False # True for Anycast Gateway otherwise False 

QoS: Provide user the ability to enable RoCE related configuration.

  • QoS:
      dscp_to_tc_map: "26:3 | 48:7"
      dot1p_to_tc_map: null
      tc_to_queue_map: "3:3 | 7:7"
      tc_to_pg_map: "3:3 | 7:7"
      pfc_enable: "3"
      pfcwd:
        enable: false
        big_red_switch: false
        action: "alert"
        restoration_time: 400
        detection_time: 400
      ecn:
        mode: "ecn"
        cnp_queue: 7
        ecn_gmin: 500000
        ecn_gmax: 1500000
        ecn_gmark: 10
        ecn_rmin: null
        ecn_rmax: null
        ecn_rmark: null
        ecn_ymin: null
        ecn_ymax: null
        ecn_ymark: null
      scheduler:
        type: "DWRR"
        weight: "0:0 | 1:0 | 2:0 | 3:90 | 4:0 | 5:0 | 6:0 

Creating Configuration

  • Navigate to Configurations >> Configure >> YAML

YAML Config Illustrator

While configuring the topology, users can utilize the "Visualize YAML" feature to preview the structure and layout.

Navigate to Configurations >> Configure >> Configure Devices >> <Upload Valid YAML> >> Visualize YAML

Applying Configuration

Click on Apply Configs button in the bottom right corner of the above screen, to push the configs across the entire fabric.

ONES provides real-time updates when the devices are being configured and validates the configurations automatically to ensure the network is ready to use.

You will see the below screen, after the configurations are successfully verified:

FRR config Issue

  • Go inside BGP Container & Open docker_init.sh

    root@Leaf-1:/# vi /usr/bin/docker_init.sh
  • Look for "Split" Keyword & Comment out the statemets inside that with if conditions

    elif [ "$CONFIG_TYPE" == "split" ]; then
        #echo "no service integrated-vtysh-config" > /etc/frr/vtysh.conf
        rm -f /etc/frr/frr.conf
  • Add a new line which writes Service integrated in vtysh.conf

    elif [ "$CONFIG_TYPE" == "split" ]; then
        #echo "no service integrated-vtysh-config" > /etc/frr/vtysh.conf
        echo "service integrated-vtysh-config" > /etc/frr/vtysh.conf
        rm -f /etc/frr/frr.conf
  • Comment rm -f /etc/frr/frr.conf & save the changes

    elif [ "$CONFIG_TYPE" == "split" ]; then
        #echo "no service integrated-vtysh-config" > /etc/frr/vtysh.conf
        echo "service integrated-vtysh-config" > /etc/frr/vtysh.conf
        #rm -f /etc/frr/frr.conf

  • Commit the docker Changes

    root@Leaf-1:/home/admin# docker commit bgp
    sha256:c67656393b902cf7bf514094a219eb75f5bf45340023848be51e26632344caa3

Various fields shown in the top right corner of the above slide are explained below:

Sub-options per device

Connect

Configuration Page allows a user to connect to the device using console access or using SSH method too.

Navigate >> Configuration >> Configure >> <Device sub options> >> Connect

User can choose SSH or console option to access the device.

Console Logs

Console Logs show the exact configuration loaded on the device and the overview of the config loaded as per YAML & Derived Host IP Range can be viewed from the "Derived_Config:" section

Navigate >> Configuration >> Configure >> <Device sub options> >> Console Logs

  • Click on the Console Log of the device

Config

This section describes the configuration feature of ONES using which you can check the applied and running configurations.

Navigate >> Configuration >> Configure >> <Device sub options> >> Config

  • Click on Config

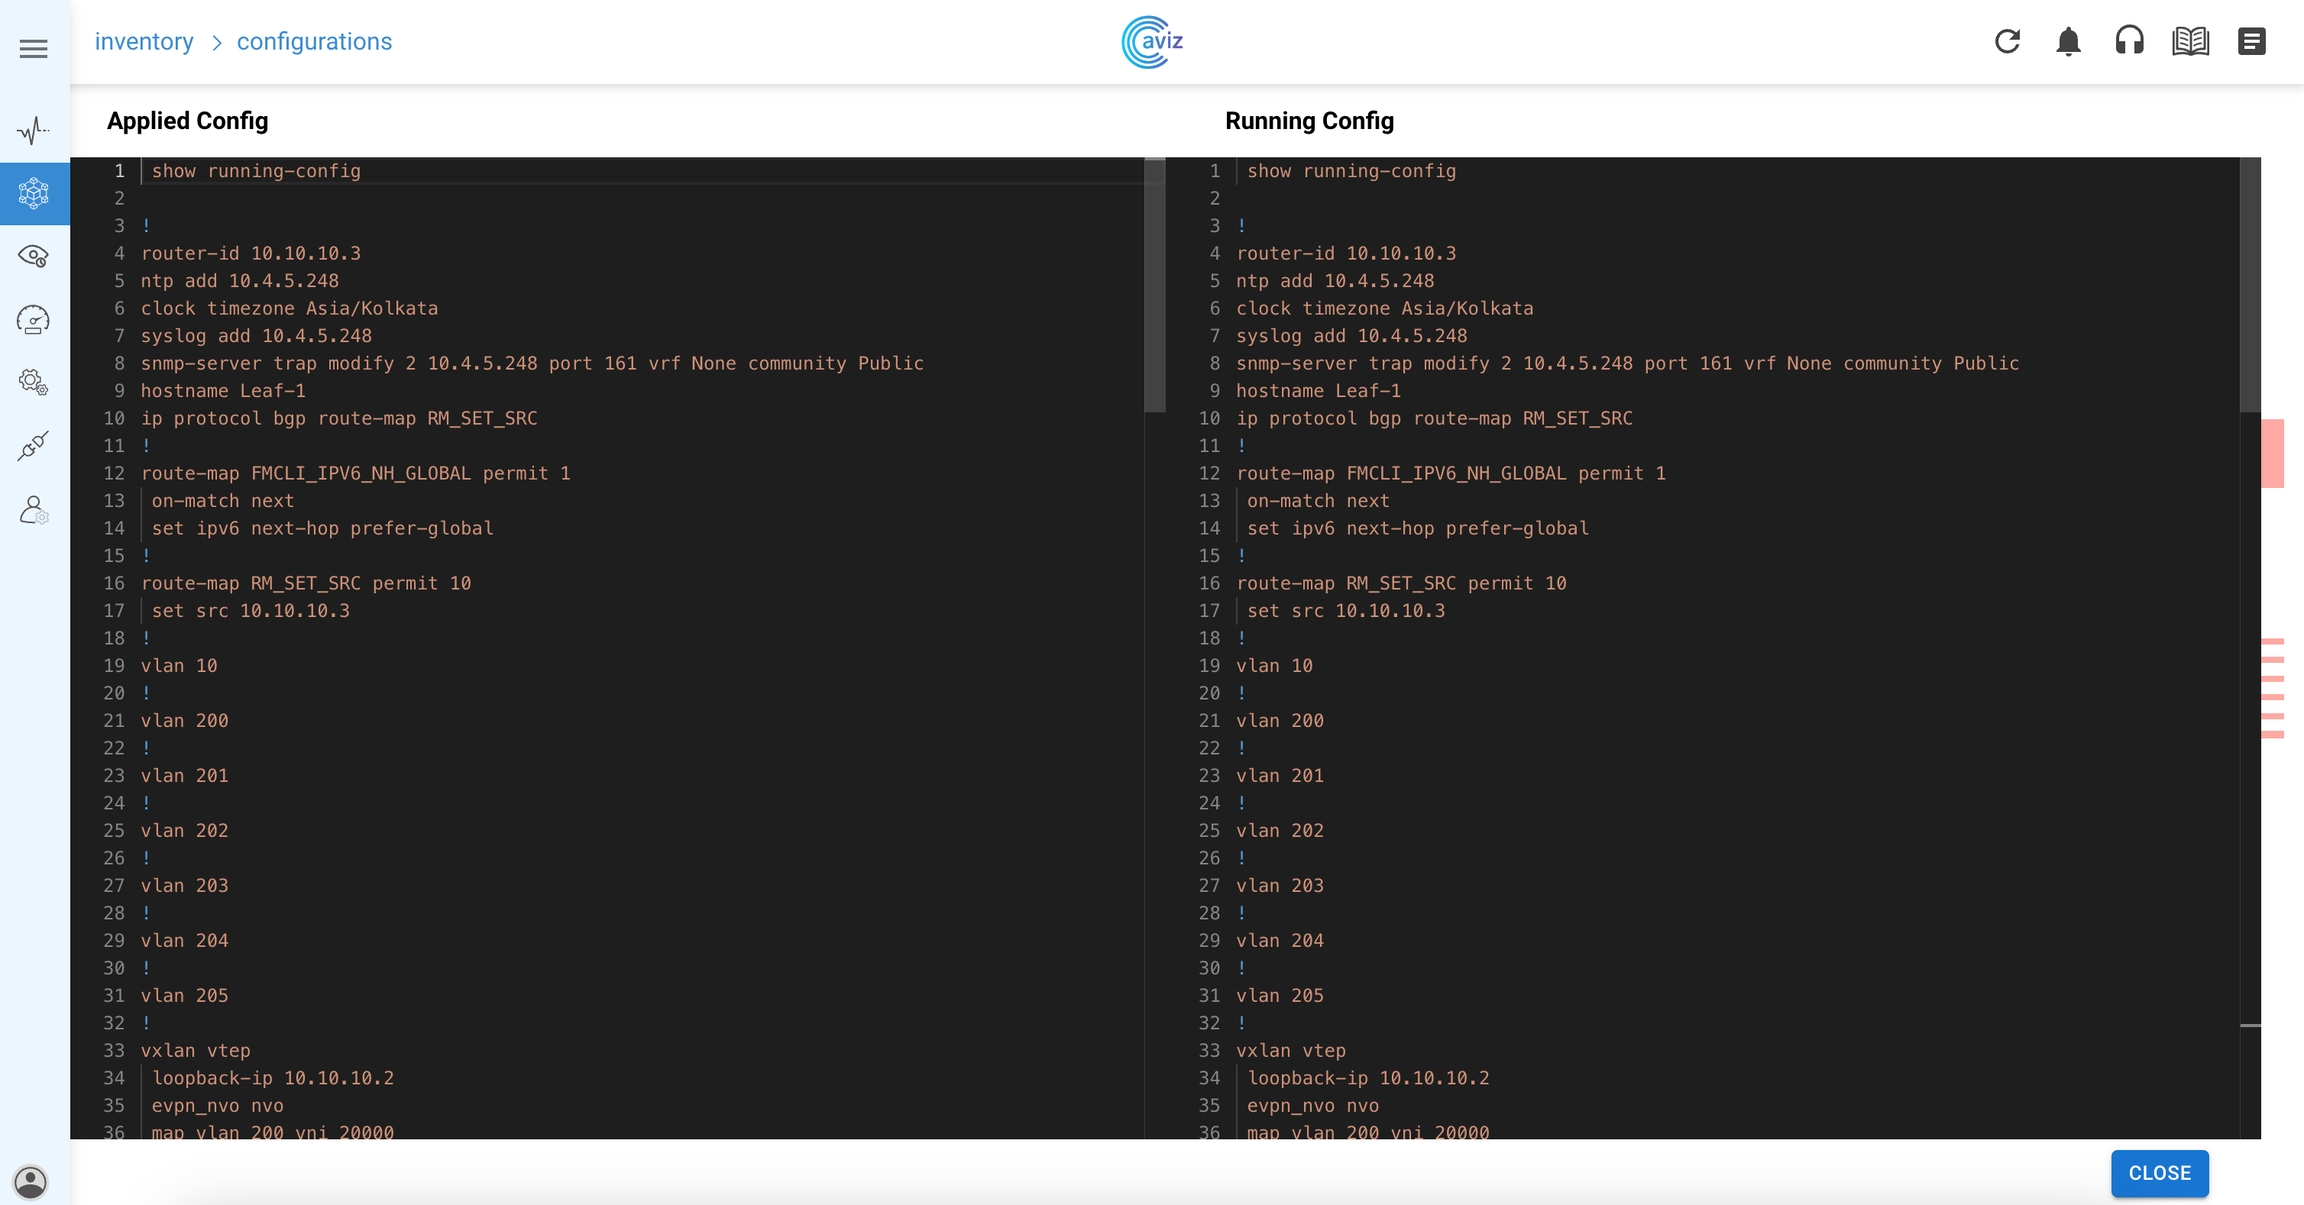
Compare Configuration

This section describes the compare configuration feature of ONES using which you can compare the applied and running configurations.

Navigate >> Configurations >> Configure >> <Device sub options> >> Compare Configs

  • Compare Config

This page allows the user to compare applied configurations to the running configuration of a selected device.

The user should select only one device from the list and perform 'Compare Config' on this page, it may take several minutes to fetch the running configuration from the device

YAML Editor will appear with two windows comparing applied and running configurations as depicted in the below picture

The difference in configuration is highlighted with colour coding in the respective window of the configuration​​

Config

Navigate >> Configurations >> Configure >> <Device sub options> >> Compare Configs

This option allow a user to do Day-N operation or any customized config per device.

Last updated