Aviz Service Node (ASN) offers a cost-effective way to network visibility, application identification, and extract HTTP metadata & DNS information. By using general-purpose hardware, ASN avoids vendor lock-in reducing cost. ASN boast features like high-performance packet processing, data filtering and extraction, and real-time monitoring for in-depth network analysis. ASN can be deployed in large clusters for scalability and redundancy, making it a suitable solution for enhancing network performance in modern infrastructures.
Aviz Service Node
5G Deployments
ASN extracts essential metadata from 4G-LTE, 5G-NSA, and 5G-SA networks, offering deep visibility across all types. It specializes in correlating data using protocols like:
S11 (GTP-C), S1-U (GTP-U) for LTE/5G-NSA
N4 (PFCP), N3 (GTP-U) enhanced with N11 (SBI-HTTP2) correlations
5G-C Correlation
ASN can correlate GTP-C/U for in-depth 4G/5G network analysis. It extracts detailed metadata from the control plane (N11) and user plane (N3 GTP-U), including user equipment information, traffic details, and key performance indicators.
Mobile Handover
ASN excels at managing mobile handovers in 4G and 5G networks, Maintaining seamless continuous connectivity and optimal network performance for users in motion. It can handle various handover scenarios, such as transitions between gNodeB (5G base station) and eNodeB (4G base station) or handovers involving the AMF (Access and Mobility Function) in 5G-SA networks.
Application Identification
ASN utilizes Deep Packet Inspection (DPI) to identify over 500 applications at high speeds. It employs techniques like pattern recognition, SNI matching, IP geolocation, and port analysis to extract application data directly from network traffic. This rich data includes user agent information, IP details, and critical network performance metrics like bandwidth usage, packet loss, and latency.
Management and High Availability
FlowVision is the central control for Aviz's network visibility solution, including ASN & . It provides a unified interface (GUI and APIs) to manage ASN functionalities like data filtering, extraction, and export.
FlowVision also offers real-time insights:
ASN health
Network traffic utilization, and
logs for troubleshooting.
Additionally, ASN's built-in High Availability module ensures redundancy for both small and large deployments.
Guides: Jump right in
Explore these guides to set up and work with the Aviz Service Node.
What's New?
Release 1.3
Advanced Interval-Based KPI Calculation
Bandwidth and Latency KPIs are now computed with sub-5-second precision, enabling granular performance monitoring and real-time analytics for network optimization.
Optimized Kafka Metadata Export
Kafka export now delivers higher accuracy and lower processing latency, ensuring metadata attributes are efficiently processed and exported with sub-5-second precision for enhanced data integrity and correlation.
Release 1.2.1
Release 1.2.0
- Kafka Authentication feature with SASL Username and Password
- Kafka Authentication feature with TLS-SSL Certificate
New Japan Local Applications Support include,
FOD
LINE
Piccoma
Tver
- Users can choose the port mode via FlowVision between C-plane and U-plane based on the physical connections of NiC Ports
- Licensing is enabled for ASN Telco ,ASN App and ASN FlowVision
Release 1.0.0
System
The System menu lets you perform the following actions:
Server Specifications
Server Specifications for Handling up to 180-200 Gbps.
Type
Details
Licensing
Aviz Service Node supports three license types listed below:
ASN Telco
ASN Data Center
PCIe
4th Gen PCIe
OS
Ubuntu 22.04.4 LTS
Disk Space
12TB
Bandwidth Capacity
Maximum 180 to 200 Gbps per server
C-Plane - 1Gbps
U-Plane - 180 to 200 Gbps
The specifications listed are for a single server. For redundancy, the Bill of Materials (BOM) should include two servers.
5G Correlation, GTP Correlation, and Stateful Flow Sampling
GTP C/U Correlation for 4G-EPC and 5G NSA.
Upto 50 Gbps
Subscribers - 1M
ASN_TELCO_TIER2 (ADVANCED)
ASN_TELCO_BASIC + PCAP Generation
Upto 100 Gbps
Subscribers - 2M
ASN_TELCO_TIER3 (SCALE)
ASN_TELCO_BASIC + Security/Filter Sampling
Subscriber aware Load balancing
Upto 100 Gbps
Subscribers - 2M
ASN_TELCO_TIER4 (PERF)
ASN_TELCO_SCALE
ASN Data Center
License
Features
Scale & Throughput
ASN _DC_TIER1 (BASIC)
Advanced Filtering, Tunnel Stripping, Decap
Load Balancing
Header Stripping and Decap
Upto 50 Gbps
Sessions-15M
ASN_DC_TIER2 (ADVANCED)
ASN_DC_TIER1 +
IP Session Extraction & Correlation
Stateful IP Flow Sampling
Upto 50 Gbps
Sessions-15M
ASN_DC_TIER3 (SCALE)
ASN_DC_TIER2 + PCAP Generation
Upto 100 Gbps
Sessions-30M
ASN_DC_TIER4 (PERF)
ASN_DC_TIER3 + Performance
ASN Application
License
Features
Scale & Throughput
ASN_APP_TIER1 (BASIC)
Application Identification
Metadata Extraction, Export via Kafka
PCAP Generation
Upto 50 Gbps
No. of Applications - Upto 500
ASN_DC_TIER2 (SCALE)
ASN_APP_TIER1 + Filter Sampling
Upto 100 Gbps
No of Applications - Upto 1000
ASN_DC_TIER3 (PERF)
ASN_APP_TIER2 +
Packet Dedup
Upto 150 Gbps
No of Applications - 1000+
FV ESXi Host Installation
Pre-Requisite:
An ESXi Host with the below minimum requirement available for FlowVision:
2 vCores
4 GB RAM
20 GB HDD
Deploying OVA:
Log in to the ESXi Host and click on 'Create/Register VM'
Click on 'Deploy a virtual machine from an OVF or OVA file'
Name the VM and select the downloaded 'OVA' file
Choose the 'datastore' where you want to install the VM
Select the 'VM-Network' to ensure that the VM is reachable
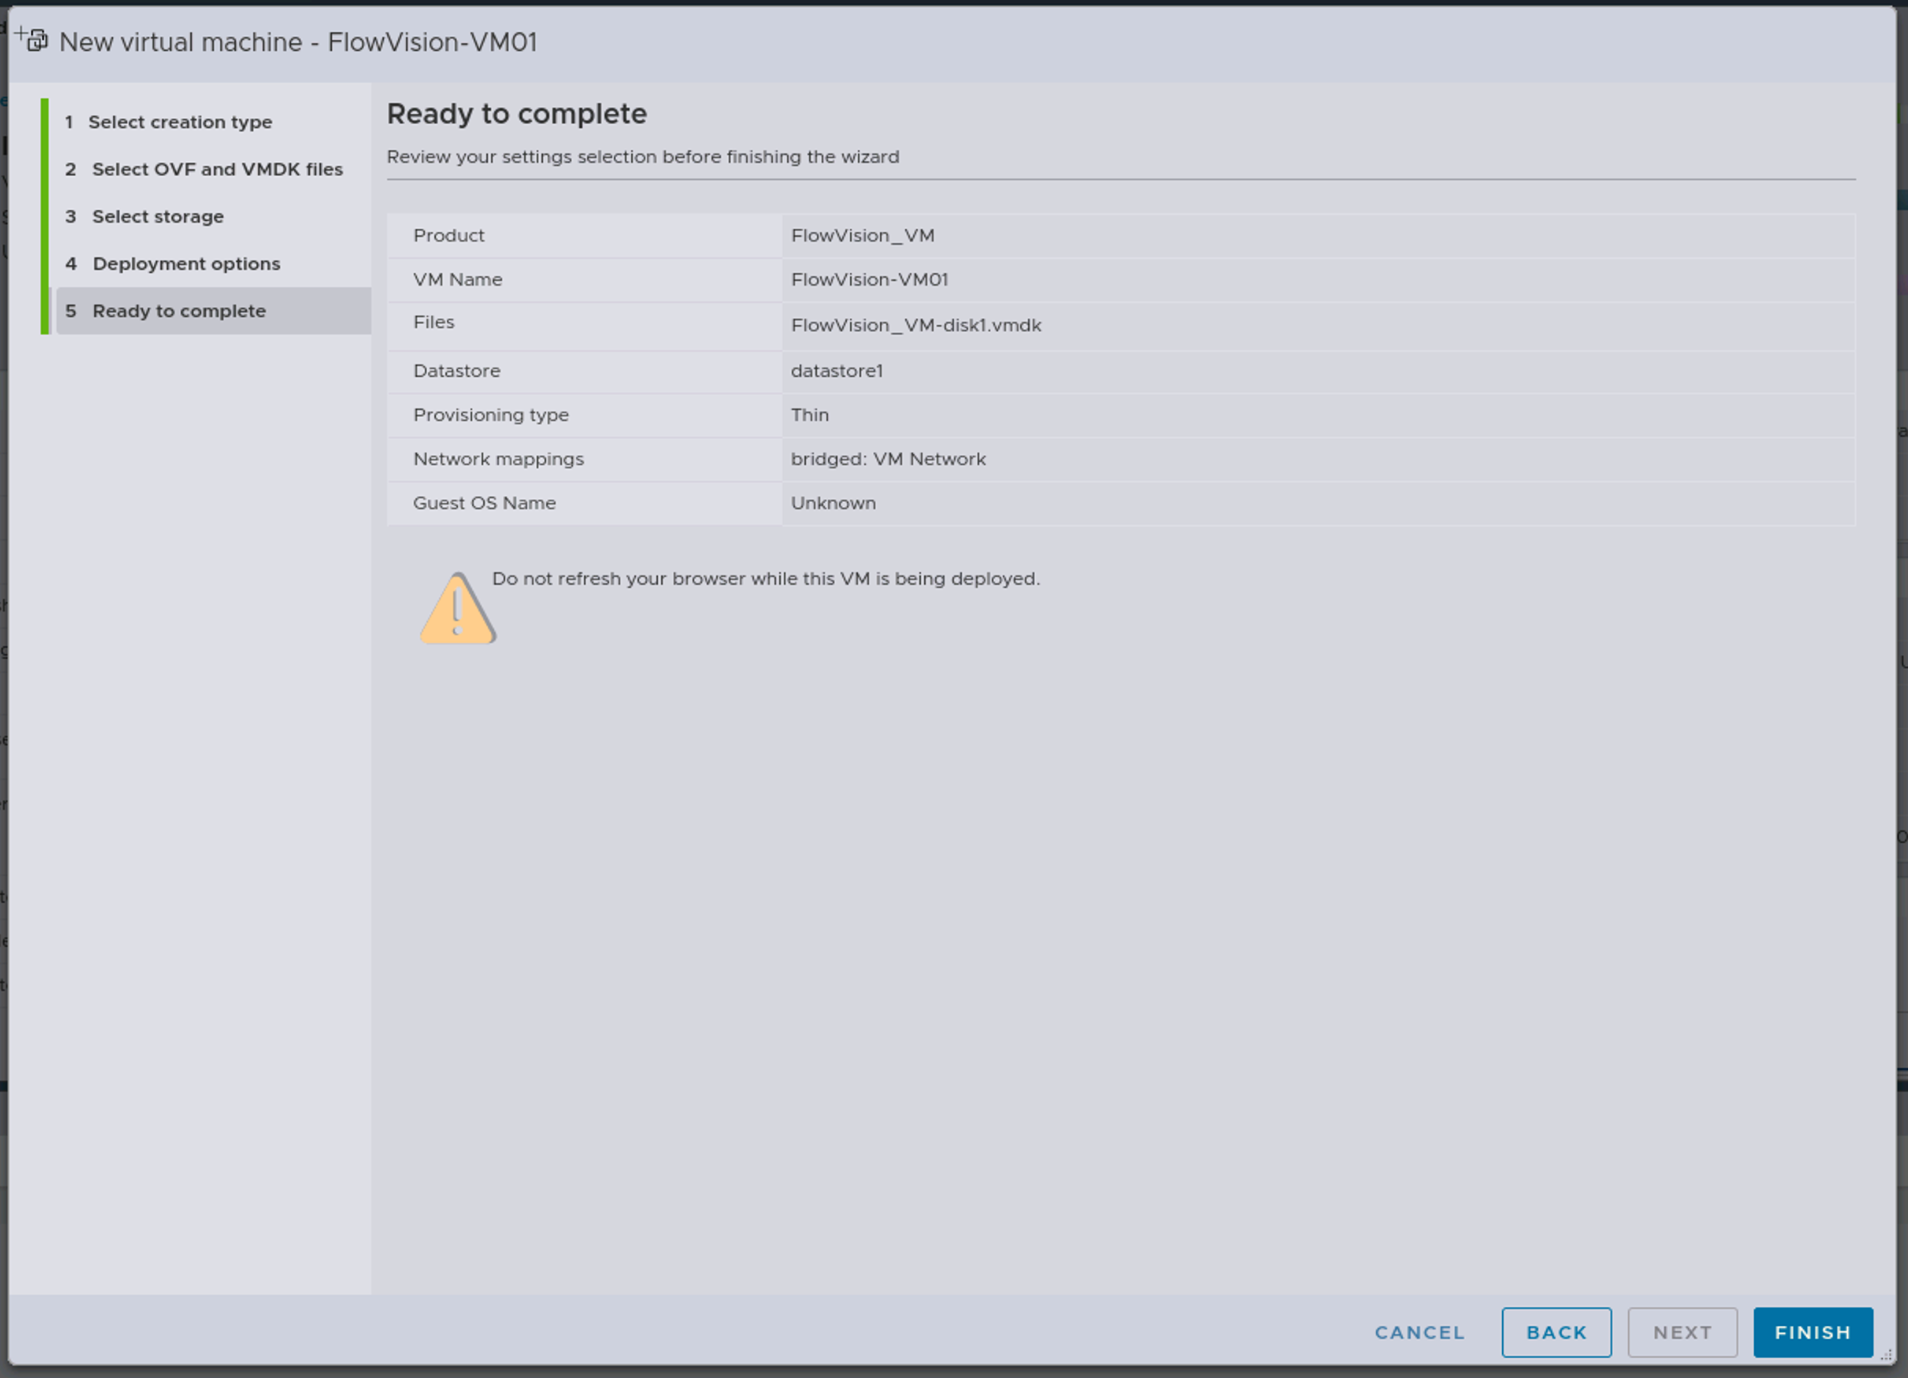
Review the configuration and click on 'FINISH'
Wait for the OVA file to upload; Check the status in 'Recent tasks' at the bottom of the screen
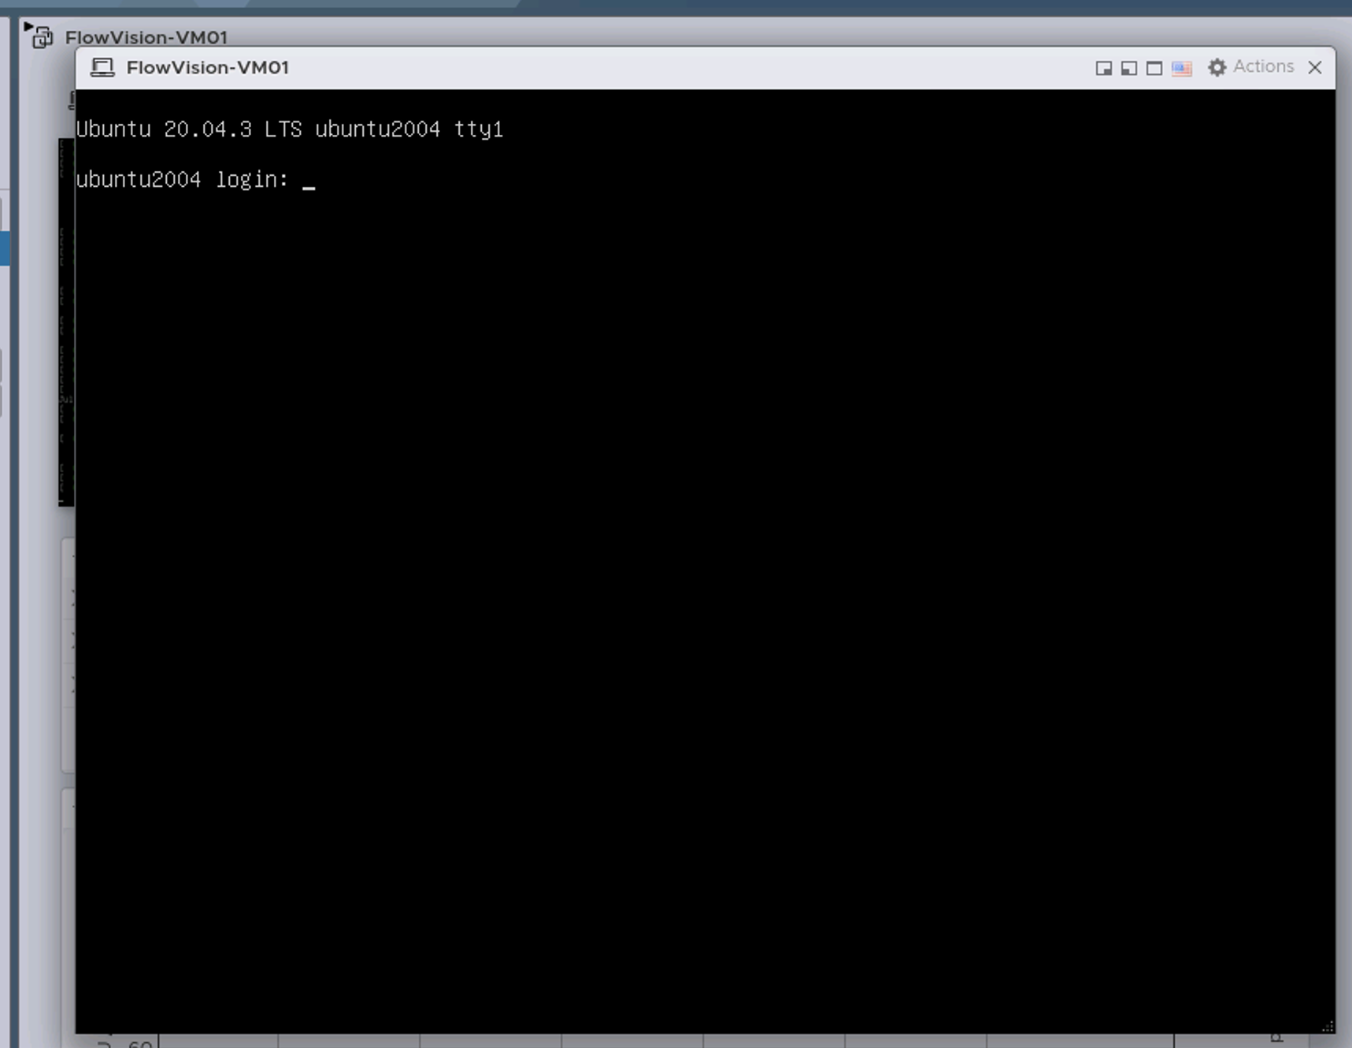
'Power on' the VM
Login to the VM with default credentials
User: aviz
Password: Aviz@123
Check DHCP assigned IP on the VM with 'ip a'
Login to the Web-GUI at https://<VM-IP>/ with default credentials
User: admin
Password: admin
Aviz Service Node Graphical User Interface Guide
Introduction
This guide explains how to use the FlowVision Graphical User Interface (GUI) to manage ASN servers efficiently.
The FlowVision GUI provides the following top-level menu options:
FlowVision uses TCP port 443 for its Web-GUI and TCP port 8091 for communication with the OPB switches.
The following image shows the home page of the Aviz FlowVision GUI:
FV VirtualBox Installation
Pre-Requisite:
A Windows machine/VM with the below minimum requirement:
2 vCores (available for FlowVision VM)
8 GB RAM
40 GB HDD
Download Oracle VM virtual box from the below link
Install Oracle VM Virtual box
Importing OVA:
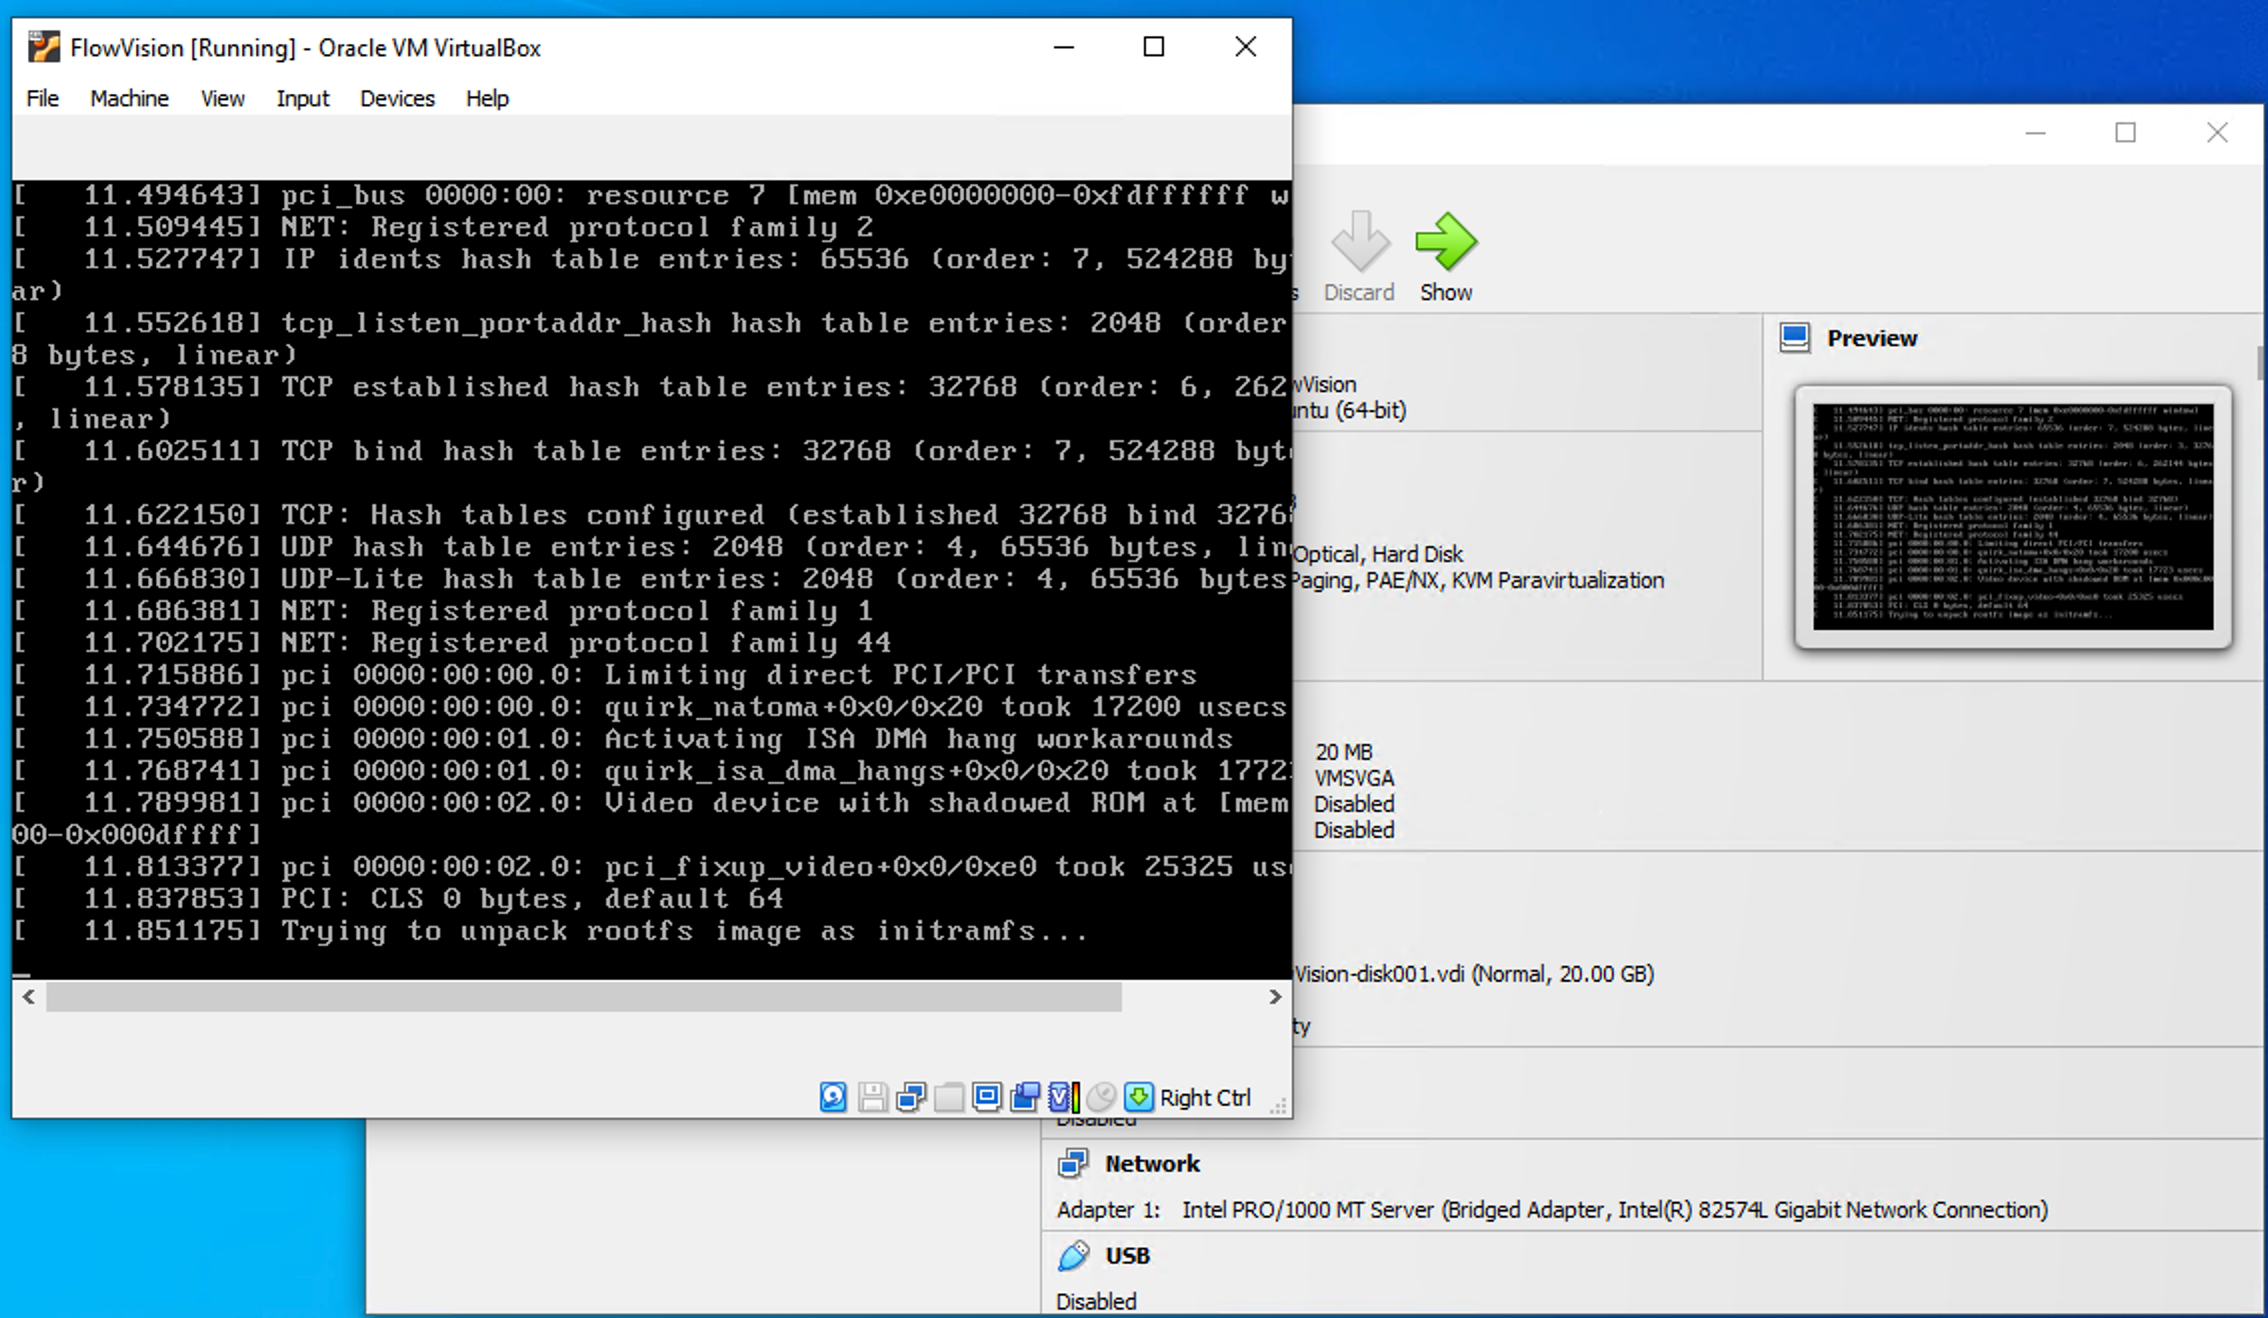
Import the OVA file in Oracle VM virtual box
Click the start button to power-on the virtual machine
Log in to the FlowVision VM with default credentials
Username: aviz
Password: Aviz@123
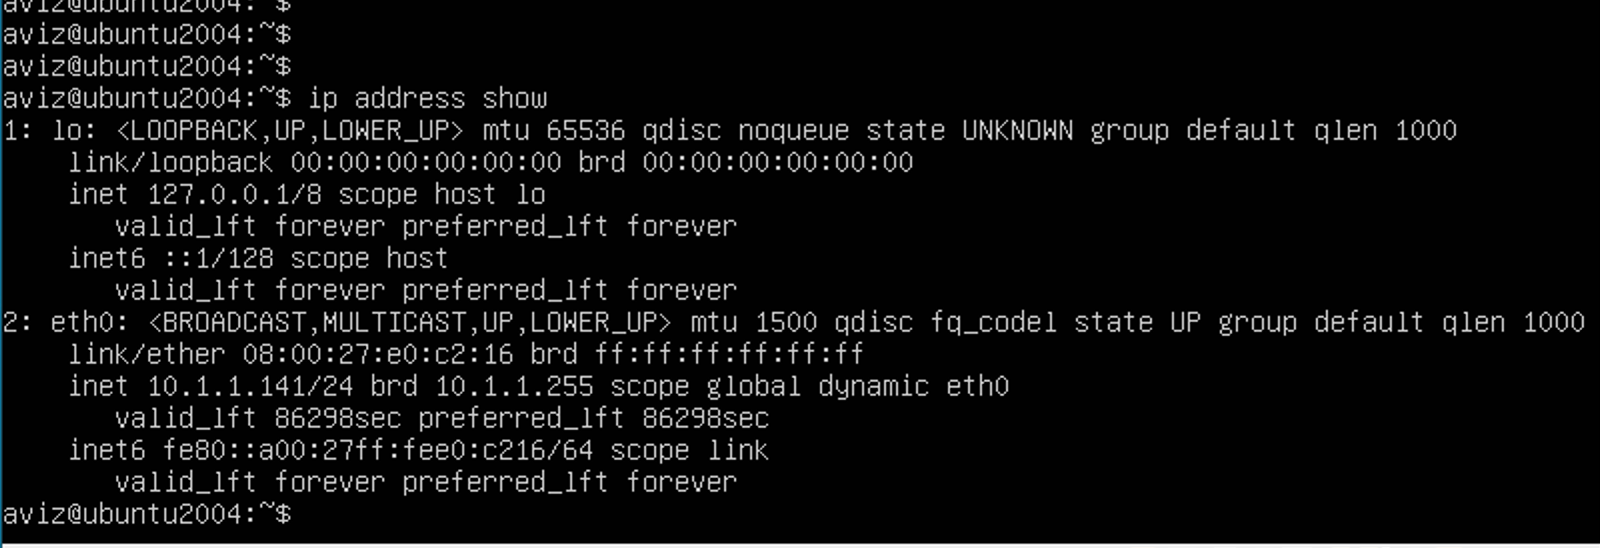
Get the IP address of the VM through ip address show
Access the GUI through the above IP using your favourite browser with http port: 8093
https://<VM_IP>:8093/
ASN Package Installation
Prerequisites
Enable internet and DNS to install packages via Ubuntu apt
Packages to Install in Server
Extract the image tar -xf asn-image-v*.tar.gz
Change to the extracted directory cd asn-image-v*
Run the installation script for the ASN server
If any prerequisite or dependency is installed after completing the ASN installation, the following script must be re-executed:
Viewing System Log
To view the system log from the FlowVision GUI, click System > Syslog.
The Syslog page shows the system logs of all the nodes that are online. You can click the device icon for each of the online devices to get the system log for that particular device. The system log shows the device IP, component, severity level, time stamp, and the severity level message with more specific information.
The following image shows the system log table of a device:
You can change the severity level of the messages displayed in the syslog table using the Severity Level drop-down menu. The available options are Debug, Info, Notice
Managing Signature
Introduction
ASN DPI (Deep Packet Inspection) identifies applications using pattern-based signatures. Aviz Networks provides seamless signature updates, allowing support for new applications or enhancements of existing ones without impacting the existing deployment.
Managing License
To configure the Licenses for ASN Nodes from the FlowVision GUI, click System > Licence
This page displays the current license details in a table format along with Node IP, MAC Address & Serial Number allowing you to either add a new license key for a new ASN device or update an existing license.
The following license details are shown for each ASN device:
Subscriber License Key, Type & Status
Accessing System and Device Information
To access the system and device information, click System > General.
System Information
The system information table shows you the product name, version, and technical support information about the system.
Managing Users
To manage users from the FlowVision GUI, click System > UserManagement.
The User Management page shows the details of all the users of the system and their user privileges and roles. From the User Management page, you can add new users, edit user roles and permissions, de-activate a user, and delete a user.
You must have admin privileges to add, edit, or delete a user.
The following image shows the User Management page:
Managing Devices
To manage connected nodes from the FlowVision GUI, click System > Devices.
The Devices screen shows all the connected nodes and their connection status. The nodes that are online are shown with a green status and the nodes that are offline are shown in a red status.
You can click the icon to reboot an online device. To delete a device, click the icon. ASN configuration is autosaved to the DB periodically, use the icon to save the configuration explicitly.
The following image shows the Nodes page:
Viewing the Dashboard
The Dashboard is the default home page of the FlowVision GUI. To return to the dashboard view from any other page, click System > Dashboard.
The Dashboard shows you the following data:
OPB Fabric Information
Metadata Extraction of S1-u, S11, N3, N4, N11
N4 and N3 Correlation for 5GSA
N4 or N11 and N3 Correlation for 5GSA
N4 SBI Metadata for Ericsson 5GC vtap
Metadata Extraction of DC Packets
Metadata Extraction of DC/FTTH Packets
KPI Calculation
Metadata export via Kafka
Upto 150 Gbps
Subscribers - 3M
Upto 150 Gbps
Sessions - 45M
install-asn-server.sh
Reboot the server sudo reboot
After rebooting, install DPDK ports install-dpdk-ports.sh
In the License Information Table, the Subscriber License Key and Application License Keycolumns include an information icon
When hovering over the info icon, detailed license information will be displayed, including:
License Type
License Status
License Info
The following image shows you the system information tab:
Table displaying system information
Devices Information
The Devices Information table shows detailed information and properties of each connected ASN node. For each ASN node, the table shows the IP address, the MAC address, the Name of the device, the Version, the location, the Ubuntu version of the service, uptime, and the options to edit them.
Table displaying devices information
Editing Device Properties
You can edit device properties from the Devices Information table:
Click the Edit button corresponding to the required node on the Devices Information table.
The Device Properties window displays.
Change the required node property value in the editable fields. Currently, you can edit the Name and Location.
Click Save to apply your changes.
FlowVision Geneal Page
Tables showing users, roles, and management options
Adding a New User
To add a new user,
Click the ADD button on the header of the user management table at the top.
The New User window displays.
Specify the Email address, Username, Password, and Role of the new user in their respective fields. The Role drop-down field has two options - Admin and Viewer. The Admin role has full access and the Viewer role has read-only access.
Click Save to create the user.
Editing Existing Users
To edit an existing user,
Click the Edit button against the user in the User Management table.
The Edit User window displays.
Edit the required details in the Email, Username, Password, and Role fields.
Click UpdateUser to update the user details.
De-Activating or Deleting Users
In the User Management table,
Click the De-Activate button to deactivate a user.
Click the Delete button to delete a user.
Devices screen showing connected devices
Adding New Devices
To add a new device,
Click the icon at the top right corner of the Devices page.
The Add New Device window displays.
Default Credentials:
Username: admin
Password: admin
Specify the values for IP Address, Username, and Password in their respective fields.
Click Save to apply your changes and add the device. Click Discard to discard your changes.
FlowVision Devices
This pie chart shows you the device information based on the ASN Version and the ASN Location. You can hover the mouse pointer over the charts to display a tooltip with more relevant information.
The following image shows the ASN fabric information charts:
Pie chart showing the details of fabric based on HWSKU and OS
Platform Health
The platform health table shows you the CPU usage, and memory availability for each connected node. From this data, you can infer the overall health of the platform.
The following image shows the platform health table:
Table showing the health information
Link Information
The link information table displays the total number of ports across all connected nodes, the number of ports enabled with administrative privileges, and the number of ports that are down.
The following image shows the link information table:
Table showing link information
Top 5 Ports by Traffic
The top 5 ports by traffic show you the top 5 ports across all connected nodes sorted on the basis of their traffic rate. The table shows you the device, port, Mode, In Pkts & the number of In Discards.
The following image shows the top 5 ports by traffic table:
Table showing top 5 ports by traffic
SYSLOG STATISTICS
The SYSLOG Statistics shows you the nodes sorted based on the SYSLOG messages. The table shows the device IP, and the number of SYSLOG messages, filtered by severity.
The following image shows the SYSLOG Statistics:
Table showing SYSLOG Statistics
ASN MODULE STATUS
The ASN Module Status shows the top nodes and their health with details about the various components of ASN sorted node IP.
The following image shows the ASN Module Status:
Table showing ASN Module Status
HA STATUS
The HA Status shows the HA status between the connected nodes along with the Cluster Status & Data Export Status.
The following image shows the HA Status:
Table showing HA Status
ESXi Host
Deploy the OVA
Select the OVA
Select the datastore
Select VM network
VM configuration
Wait for OVA upload
Power-ON VM
FlowVision VM
FlowVision DHCP IP
FlowVision ASN-GUI
4G-LTE/5G-NSA
Configurable Metadata Extraction in ASN
From this page, you can enable or disable the following metadata extraction options on the Aviz Service Node (ASN) for 5G-NSA:
User Information
IMSI (International Mobile Subscriber Identity): A unique identifier for a mobile subscriber.
IMEI (International Mobile Equipment Identity): A unique identifier for a mobile device.
MSISDN (Mobile Station International Subscriber Directory Number): The phone number associated with the subscriber.
User Location Information
CGI(Cell Global Identifier): A unique identifier for a cell in a mobile network.
SAI(Service Area Identifier): Identifies the service area within a network.
RAI (Routing Area Identifier): Specifies the routing area within a mobile network.
Tunnel Information
IPv4 Address Uplink(SGW): The IPv4 address for the uplink from the Serving Gateway (SGW).
IPv4 Address Downlink (eNodeB): The IPv4 address for the downlink to the eNodeB (Evolved Node B).
IPv6 Address Uplink (SGW): The IPv6 address for the uplink from the Serving Gateway (SGW).
Key Performance Indicator(KPIs)
Cplane Latency: The latency in the control plane, measuring the delay in signaling and control messages.
Per IMSI Metrics:
Uplane Bandwidth/Throughput: The bandwidth or throughput in the user plane, specific to each IMSI .
Configuration
The configuration menu helps you perform the following:
To perform a backup or restore from the FlowVision GUI, navigate to:
System > Backup/Upgrade
The Backups page displays a list of available system backup files with the following details:
Backup Filename
Date of Backup Creation
Backup Status
Option to Delete Specific Backup Files
Additionally, this page provides options to:
Upgrade the system using a .jar file.
Upgrade the database using a local .sql file.
The following image illustrates the Backups page:
Creating a New Backup
To create a new backup, click the Create Backup drop-down menu and select Create Backup. This action creates a new backup file, displaying its status in the backup table.
You can also have the option to selectively backup the database or the FlowVision system. To perform this selective backup,
Click Create Backup > Create Backup.
The New Backup window displays.
This will take the backup of the DB and Flowvision.
Advanced Backup
Click Create Backup > Create Backup (Advanced).
Select the backup you want to create. The available options are - Backup DB and Backup FlowVision. This is a multi-select option where you can choose either or both.
Click Backup to create the selected backup.
Restoring from a Backup
After completing a backup, you can find the list of backups in a table format below
Click on the Restore Icon to restore that particular backup (.sql / .jar ).
The New Backup window displays, used need to select Restore DB or Restore FlowVision or select both if both are available, then Click on the Restore button.
After Restore is completed, there will be a pop-up -
The user needs to refresh the browser after 1 minute interval.
Note: The user also can download the backup files ( .sql / .jar ) by clicking the Download Icon, it will save the file to the local system.
Upgrading FlowVision
You can upgrade the FlowVision system if required. To upgrade,
There are 2 types of upgrade provided
Upgrade Flowvision
Click Upgrade System on the top right corner of the Backups page. The Upgrade System window displays.
Select the Upgrade FlowVision checkbox and select .jar file from the local system
Click Upgrade to upgrade the system.
After the Upgrade, there will be a popup that -
The user needs to refresh the browser after 1 minute interval.
Upgrade DB
Click Upgrade System on the top right corner of the Backups page. The Upgrade System window displays.
Select the Upgrade DB checkbox and select .sql file from the local system
Click Upgrade to upgrade the system.
After the Upgrade, there will be a popup that -
Deleting a Backup
To delete a specific backup file, click the icon against the corresponding backup file in the Backups table. Confirm the delete action in the Confirm Delete prompt.
Please use a valid flowvision.jar or fv-db.sql file during the upgrade.
Configuring Ports
To configure ASN ports using the FlowVision GUI, navigate to:
Configuration > Ports.
This page displays:
Managed Nodes and their connected ports.
A detailed Ports Table showing:
Admin Status.
Link Status(UP = Green, DOWN = Red).
Speed & Mode.
Port Modes in ASN:
Cplane (Control Plane): Handles control-plane traffic, such as S11, N4, and N11.
Uplane (User Plane): Manages user-plane traffic, including S1-U and N3.
Hover over a device or port icon for additional details.
Editing Port Properties
By default, selecting a node in the Devices section displays all ports associated with that ASN device.
To modify port settings, click Action → Edit.
The following image illustrate the ports page with device, ports, and port status details:
Editing Port Properties
To edit the properties of a port,
Click the Edit button against the required port in the ports table.
The Port Properties window displays.
Update the above properties as required.
The following properties can be updated -
Update Port Mode
To update the mode of a ASN port in FlowVision, follow the steps below,
Select the appropriate mode from the drop-down menu with the following options:
C-plane
U-plane
The port selection must adhere to the following criteria:
At least one U-plane port must be selected.
At least one C-plane port must be selected.
After selecting the appropriate mode from the drop-down menu, Click the "Update Port Mode" button
To proceed, click the "Continue" on the popup
Once the port mode has been successfully changed, the ASN Core will automatically restart on the node to apply the updates
Viewing Audit Logs
To view the audit logs from the FlowVision GUI, click System > Audit Logs.
The audit logs table gives you the details of all the actions performed on the connected systems. The details include the action performed, the date, the IP address of the system used to login to the GUI, the resource used, the username of the operator that acted, and the status of the action.
The following image shows the audit logs table:
Audit Logs table showing the actions performed on the systems
Kafka Export Attributes
The list below specifies the unique unified data type of metadata attributes exported from ASN, 5GC-control-session-data-mapping, EPC-control-session-data-mapping, and the user-session-data-mapping file.
Configuring Kafka Security
To configure Kafka Security settings in the FlowVision GUI, navigate to:
Configuration > Kafka Security
This page allows you to modify Kafka security protocols and their configurations.
Only an Admin can configure or modify the Kafka security protocol
5G-SA
Configurable Metadata Extraction in ASN
From this page, you can enable or disable the following metadata extraction options on the Aviz Service Node (ASN) for 5G-SA:
User Information
Statistics
The Statistics menu helps you perform the following:
Configuring Global Parameters
To view and configure ASN global parameters from the FlowVision GUI, navigate to:
Configuration > Global.
The Global page displays various configurable parameters for each ASN Service Node.
The following image illustrates the ASN Global page:
Configuring Systems Parameters
To configure and manage system attributes of ASN via the FlowVision GUI, navigate to:
Configuration > Systems.
The Systems Manager page shows the Kafka, SNMP, NTP, and Syslog configurations, this page allows users to add or remove IP addresses associated with these configurations.
The following image shows the System Parameters page:
asncli#
  collect-tech-support  Collect the tech support info and Create tar file
  exit                  Exit from the Current Prompt
  quit                  Quit to Enter Native Linux Shell
  show                  Show Commands


asncli# show
  kafka-config          ASN Kafka Config
  module                ASN Modules
  version               ASN Version

asncli# show kafka-config
==================================================================
ASN Kafka Config
==================================================================
Kafka Export Status : on
Kafka Server List   : 10.4.5.227:9092
Kafka Interval Time : 30
asncli#

asncli# show module status
Calculating ASN Module Status
==================================================================
Module               Status          CPU %           MEM %
==================================================================
asn-rest-server      active          0.5             40.5MB
asn-mgmt             active          0.1             15.4MB
asn-core             active          17.2%           14.7GB
asn-snmp-trap        active          0.0             18.1MB
asncli#

asncli# show version
ASN-V1-20240715
asncli#
You can use the below command to collect-tech-support data
asncli# collect-tech-support
ASN Techsupport Collection Started
Tech Support Collection Success - /etc/log_asn/asn_techsupport_20240725_025100.tgz
asncli#
SASL Support:
Configure SASL authentication by providing:
Username
Password
Click Save to apply the changes.
SASL Configuration
TLS Support:
To enable TLS security, upload the required files:
CA File
Certificate File
Key File
Password
After uploading the files, click on Save to apply the changes
Ensure the correct CA, Certificate, and Key files are uploaded.
Only .pem format files are supported.
TLS Configuration
No Security Mode:
If you don't want to configure SASL or TLS security, select "None" here to disable Kafka security.
Cancel Button, If a user modifies the configuration (e.g., switching between SASL and TLS) but clicks Cancel instead of Submit, the system will automatically revert to the previous configuration.
To view the port statistics of the connected devices from the FlowVision GUI, click Statistics >ASN> Ports.
The Ports statistics page shows you the connected Nodes, the available ports on each Node, and the counters. By default, when you select a device the statistics for all the ports in the device are displayed. If you want to get the statistics of a particular port, select the port from the list of ports.
The following image shows the ASN port statistics page:
Port statistics page
CPLANE
Port: The name of the port.
Rx Packets: The number of received packets.
GRE Decap: The number of GRE packets decapsulated.
UPLANE
Port: The name of the port.
Rx Packets: The number of received packets.
VxLAN: The number of VxLAN packets received.
Help
The Help page takes you to the REST API documentation. To get to the REST API from the FlowVision GUI, click Help > REST API.
This action takes you to the Swagger UI page with the FlowVision REST API.
Swagger UI showing the FlowVision Rest API
Description
Serial Number
Host Name
Attachments (Tech Support Dump, Screenshots, Logs)